

How To Edit A Template In Blender
This Blender Composition Tutorial explains step past step how to use the Blender Compositor Editor. We will cover several composition examples to get y'all started.
Compositing usually refers to when you combine several images or sources to create a single resulting work. In Blender Compositing is something a lot closer to what is usually called post-processing. Information technology is when y'all apply dissimilar visual aspects, such as filters to the image or a video to make information technology await more appealing.
In 3D Design, usually, to mail service-process their creation, people utilise tertiary-party software – mainly Photoshop. Blender incorporates post-processing features into itself, so there would be no need to apply tertiary-political party programs.
Blender Compositing Workspace
To start with this Blender Limerick Tutorial we volition need to open a Compositor editor. Or also yous tin open a Compositing workspace preset.

Compositing workspace
It opens the Compositor editor on the tiptop and Dope Sheet on the bottom. Dope Sheet is a very useful window if you are dealing with animations and post-processing videos. But if you are working with an image – at that place is no need for it.
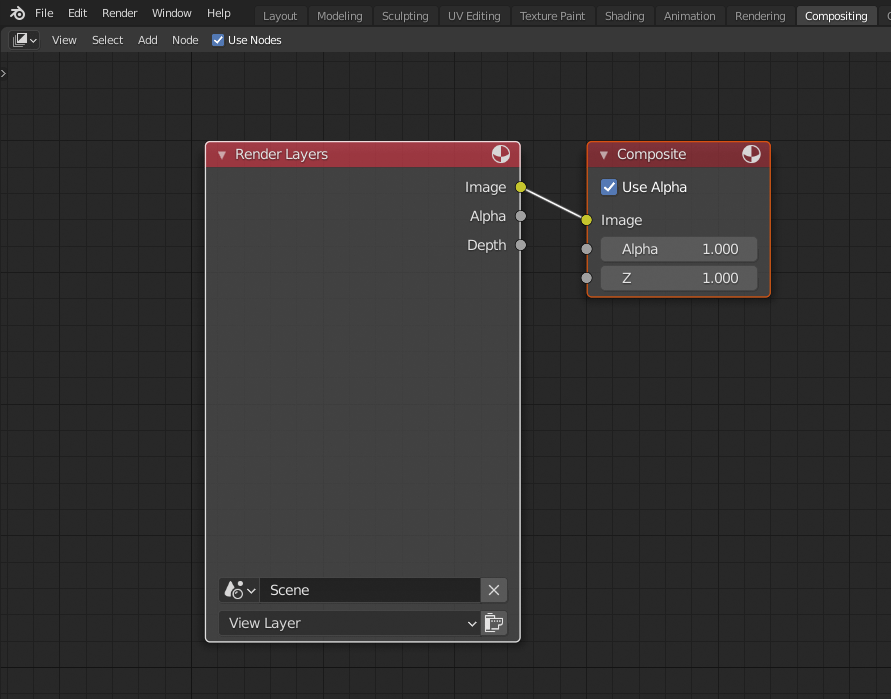
You have probably noticed, that the Compositor Editor is empty. Nothing is there. To set that, you just tick the Employ Nodes setting and some nodes will announced.
Yous will see regular Nodes, just as in whatsoever other Blender node-based editor. You may want to read well-nigh how to handle them properly in our Blender Shader Nodes Tutorial if you lot never worked with them before.
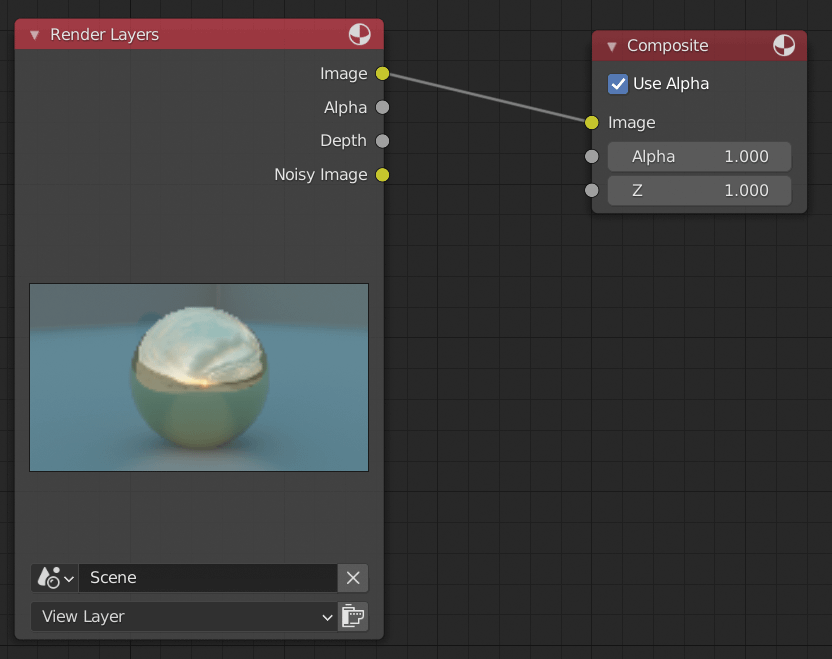
Render Layers is the main input node that yous will have. It will incorporate your original render. The blended node is the output, the final issue of the post-processing that you accept done. To use post-processing we get-go need an image, so I accept changed the default scene a bit and rendered information technology.
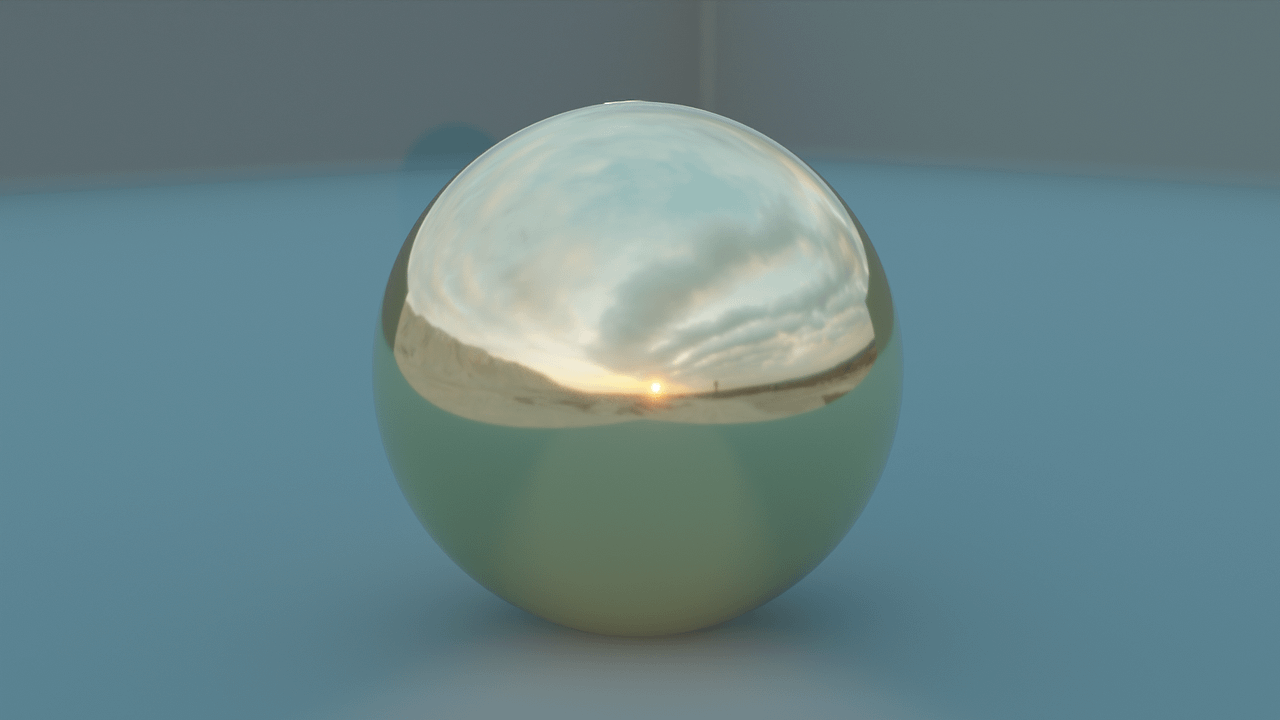
Subsequently rendering an image – I encounter it appear in the Render Layers node of the Compositing Editor:
Before proceeding, we too need to do i more thing. Correct now we tin can't see the changes that we do to the image. Meaning that if I will add a filter to it right now – there would exist no easy way for me to see it practical to the render. There are two solutions to this problem.
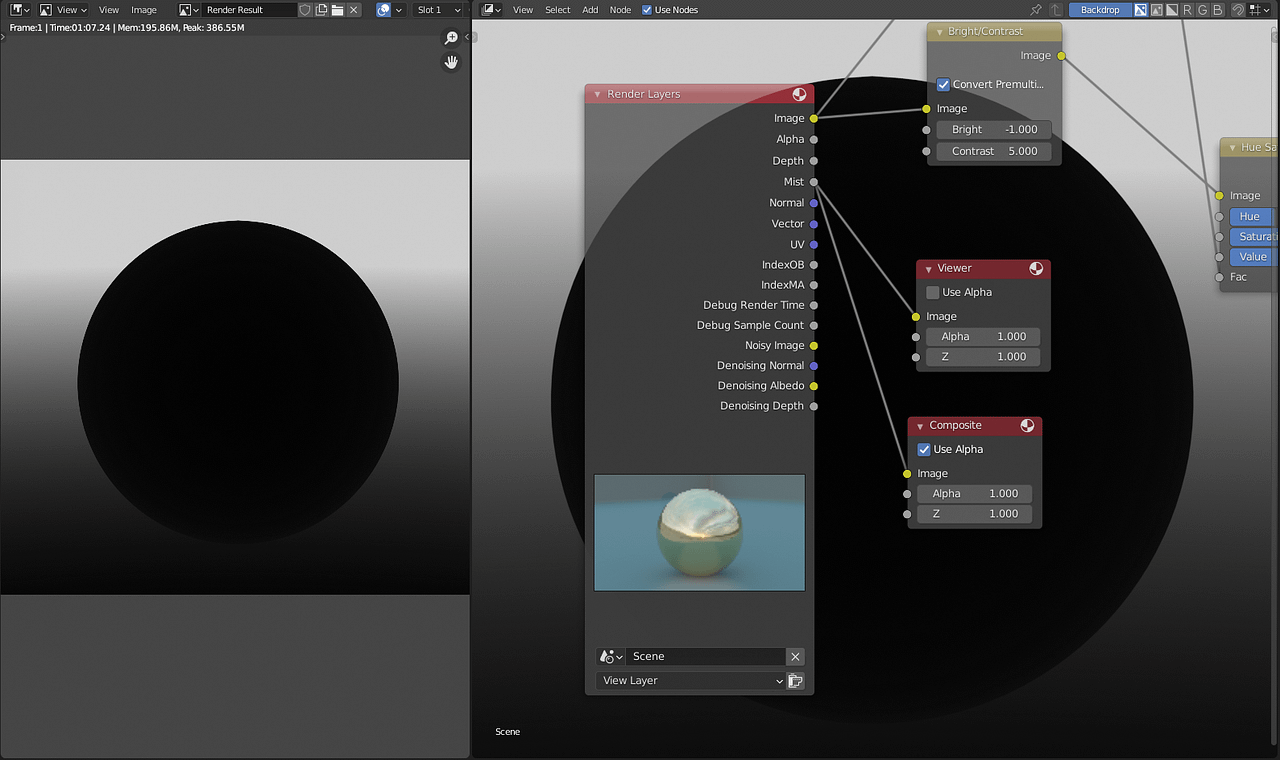
The first is to add a Viewer Node to the setup and connect it with your information. This will make it and so that the prototype appears as the groundwork of this window.
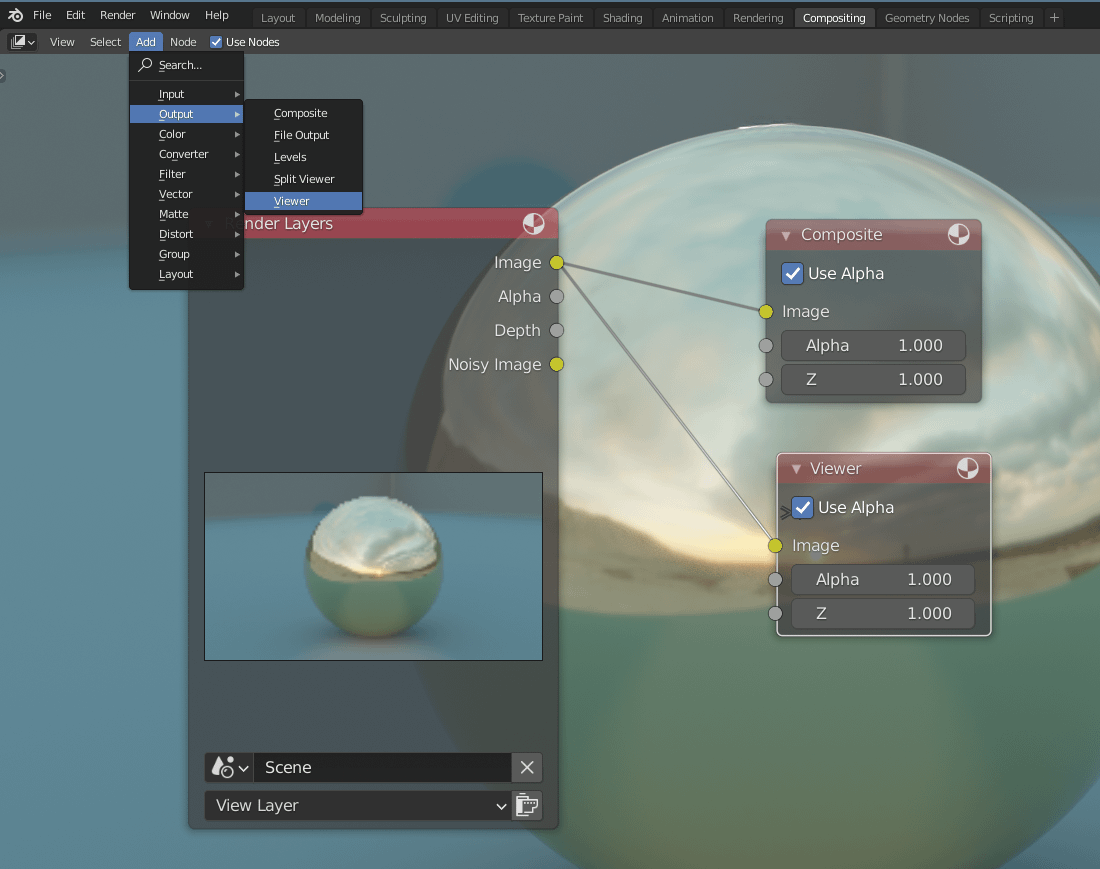
If this does not work, brand certain that the Backdrop option is turned on at the top right.

The problem with this method is that your node setup will probably obstruct the resulted view. And then the alternative to this method is to open up a new window with an Paradigm Editor in information technology. Select the linked paradigm to be your Render Event and information technology volition display exactly the upshot of the Composite Node. Or apply both methods at once, no one is going to judge you.

How to Composite in Blender
Now nosotros can brainstorm to with an instance for Blender Limerick. All we need to practice is to utilize the Blender Nodes. When you printing the Add button or [Shift+A] – you can see all the bachelor nodes. There are a lot of nodes and we tin't become through all of them. Instead, we will introduce only a few of the nearly popular and used ones.
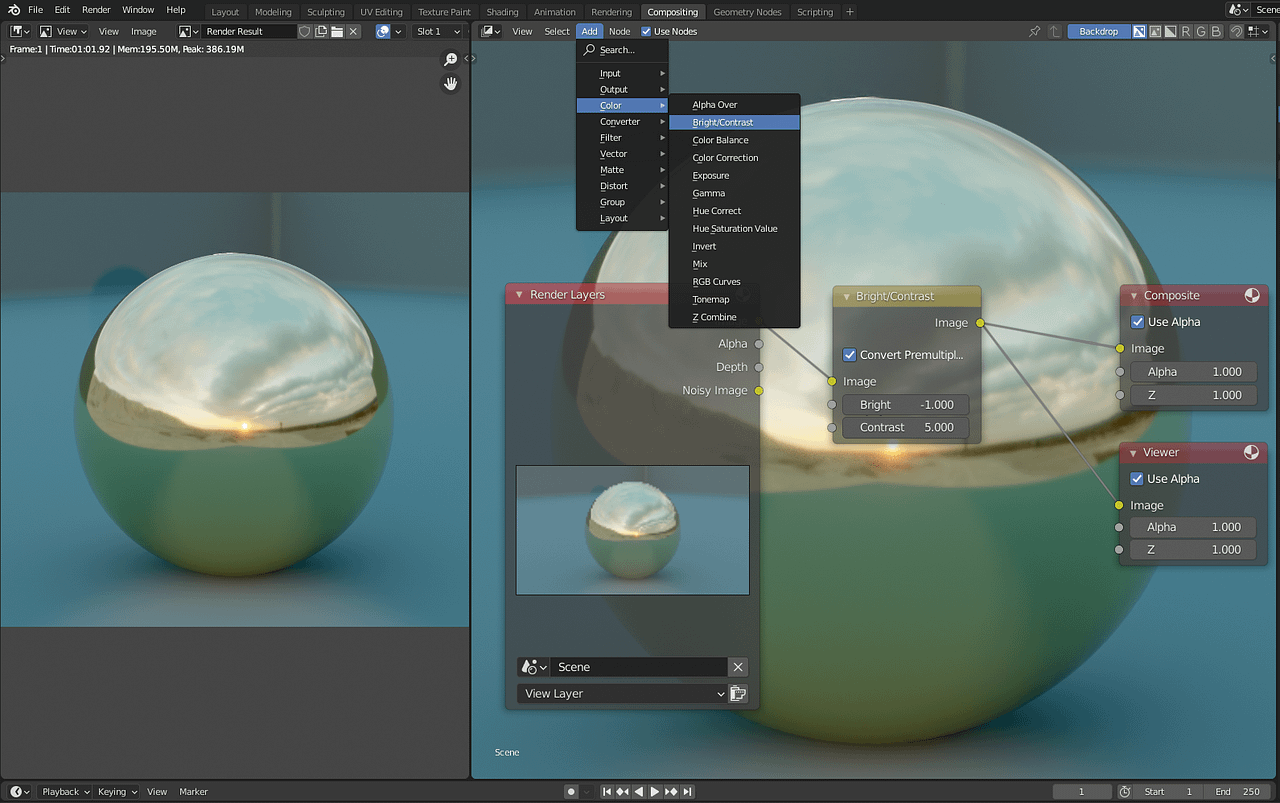
Starting with the Bright/Contrast node. Information technology is pretty easy to understand and use – you lot just control the level of brightness and contrast of the image.
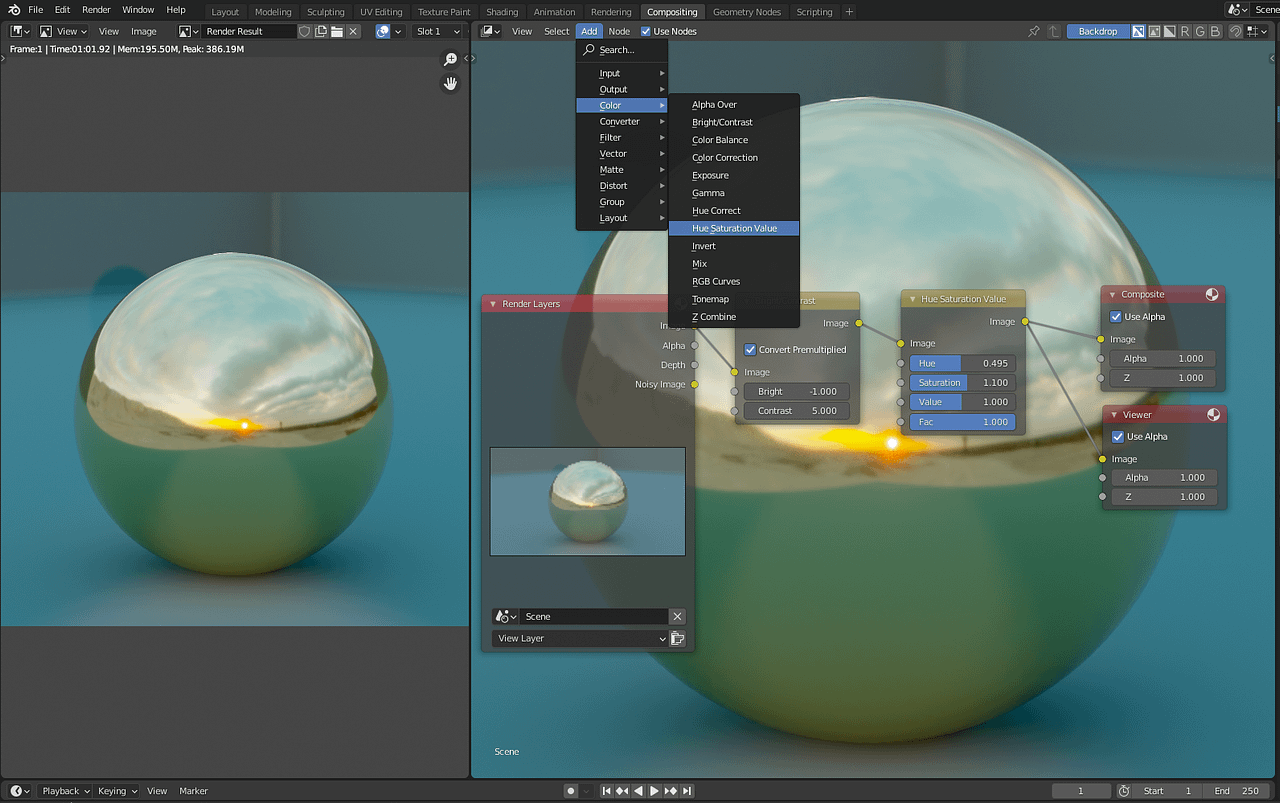
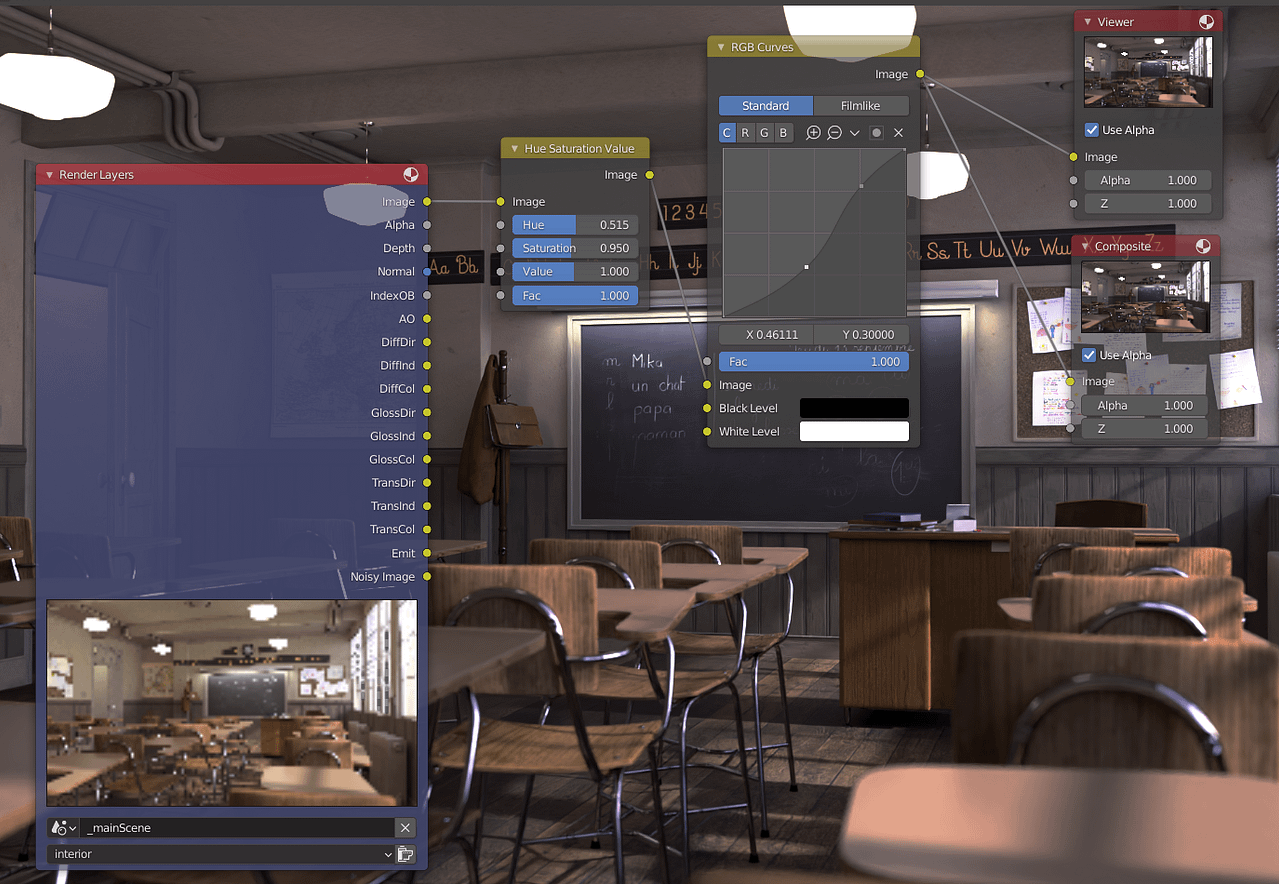
Next – Hue Saturation Value. This one is as well quite easy – allows to change the hue of the epitome and the saturation. These changes are besides controlled by the Value setting.
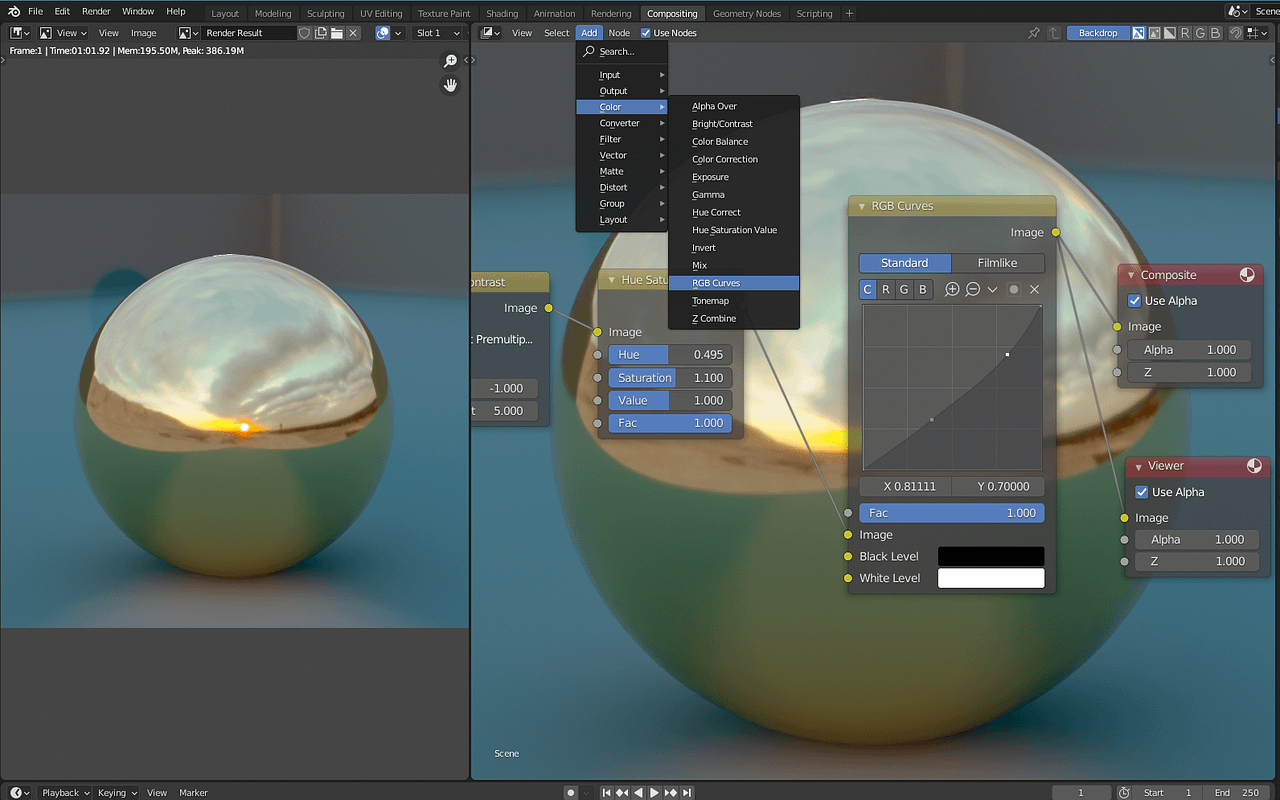
Something a bit more difficult – RGB Curves. This 1 is more advanced and allows y'all to command the intensity levels of each colour separately or for all of them together. So I accept fabricated more intense darks and a bit more prominent reds.
ColorRamp is probably even more advanced. As it is used in absolutely different means. Instead of applying to the whole image, it is used as a factor as we did before. This is because adding it to an paradigm makes it just black and white.
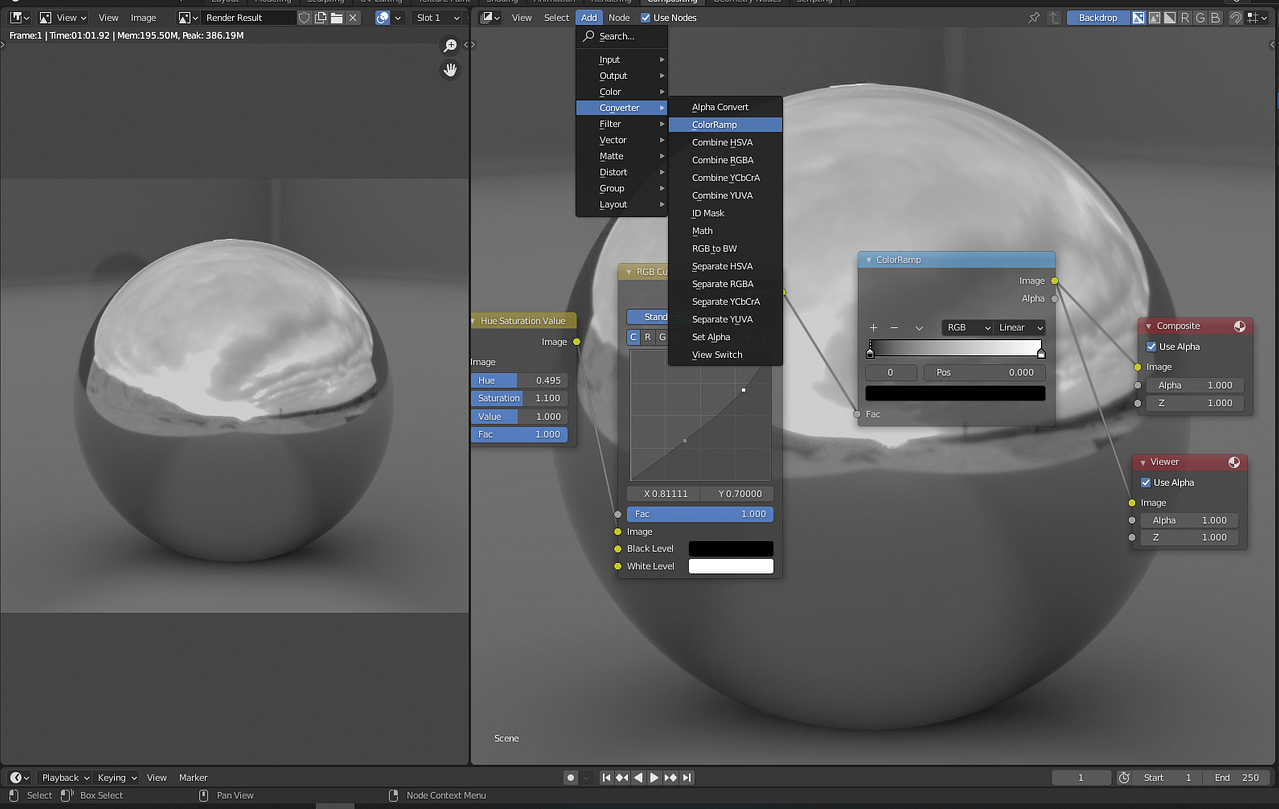
And so what is usually done is that instead of using ColoraRamp to output an image, it is used to separate parts of the image one from another. And so I connect it to the initial return and use ColorRamp to make only some parts of the scene lighter.
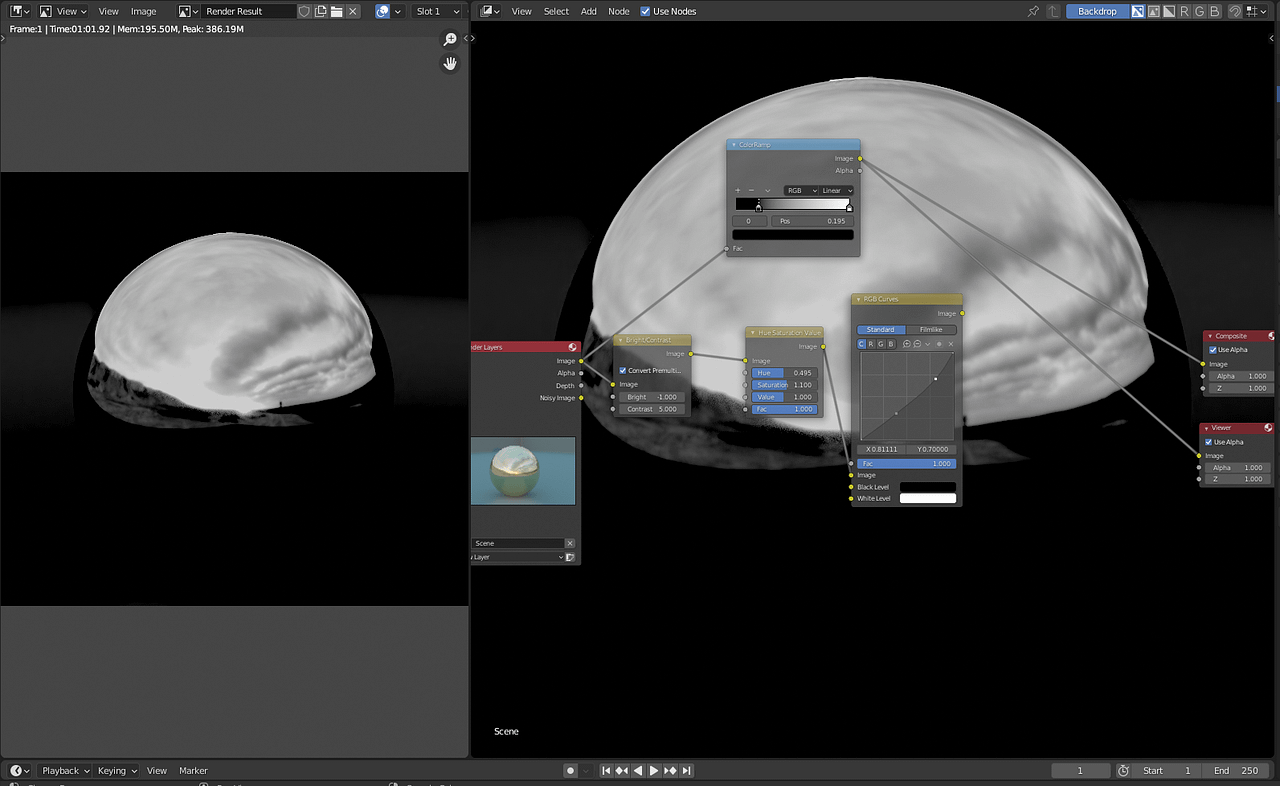
Then, instead of using this as output and connecting to Composite and Viewer Nodes – I will connect to the Hue Saturation Value node as a Factor.
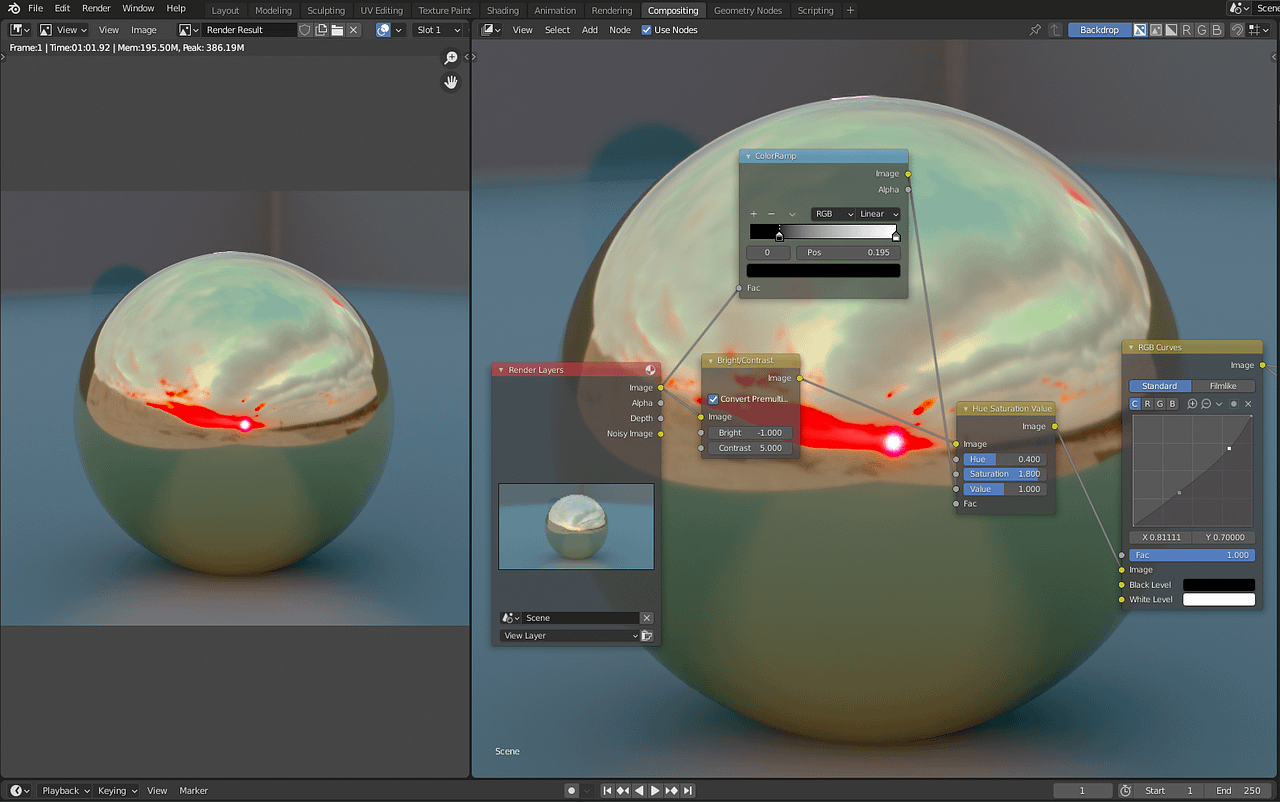
Note that only the role of the image is changed past the Hue Saturation node. Just the reflection in the ball became overly saturated, while everything else is left equally information technology was.
This is how Factor input works. It applies only to the parts of the epitome that were originally white and ignores black parts. If you look at what we received in the ColorRamp – the reflection of the brawl was white, while everything else was black.
And the last thing that I want to mention here is the data passes. Passes are additional data that Blender can provide with your return. They can exist plant in the View Layer Backdrop, where you can turn them on and off. Later on turning them on – you will encounter them appear on the Render Layers node as outputs.
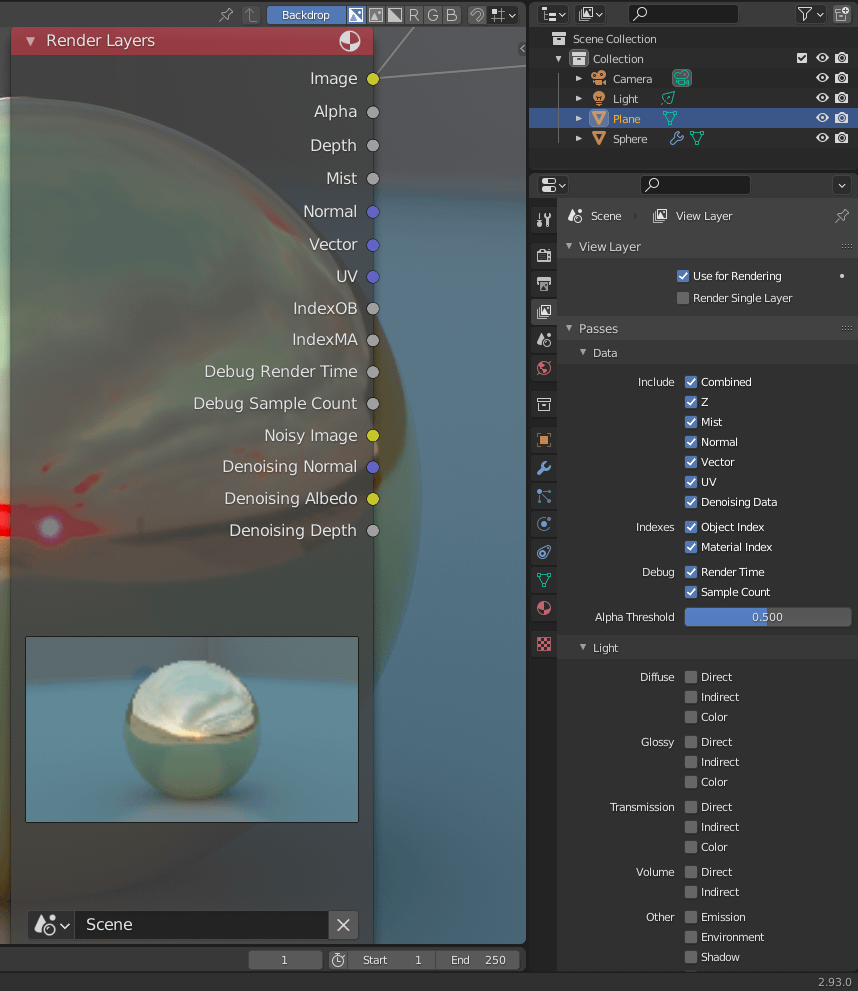
Turning all Information Passes is not a great idea, because as they provide boosted information with the render – they volition also increase rendering times. Additionally, after turning them on – you need to render your image ane more time to render these passes out.
After that, you tin connect passes to the Viewer or Composite nodes and check what exactly they do. They are very useful and can be used in very different situations. For example, instead of using ColorRamp for making render black and white and isolating parts of information technology – we could have just used a Mist pass.
Blender Composition Instance
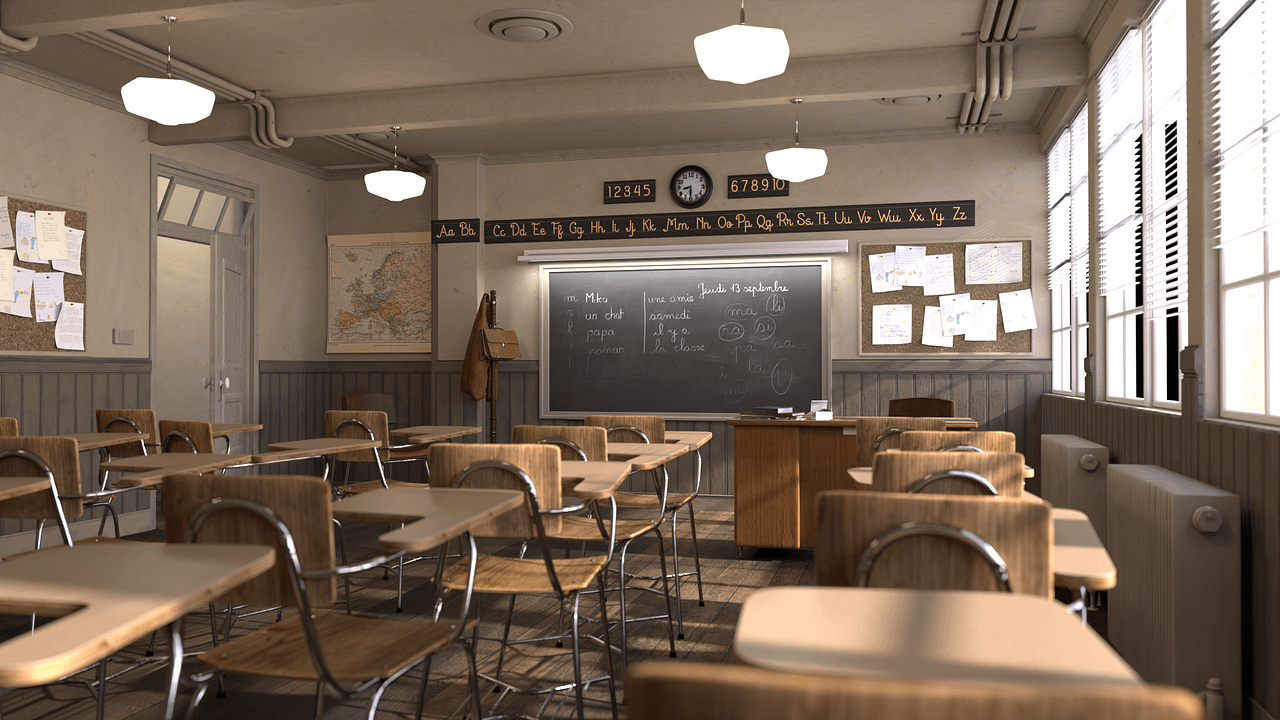
Let'due south endeavor and practice compositing on something more interesting, than just a sphere. Mayhap on something that you could try too? On Blender.org y'all can discover a lot of unlike demo files that you tin can download and try for yourself. I propose to employ this classroom scene:

Classroom scene By Christophe Seux from Blender.org demo files
If we expect at the Compositing window right now – we volition see that there is already a lot of nodes here. The person that made this scene and renders – definitely used this to their advantage. Another betoken that proves that mail-processing is very important and should be used.

Also, it is a adept opportunity for you lot to examine this setup and the nodes that are used. What are the nodes and what are they used for. Then it is important to think, that this scene is quite old and at that place can be some outdated stuff or ameliorate means to do things.
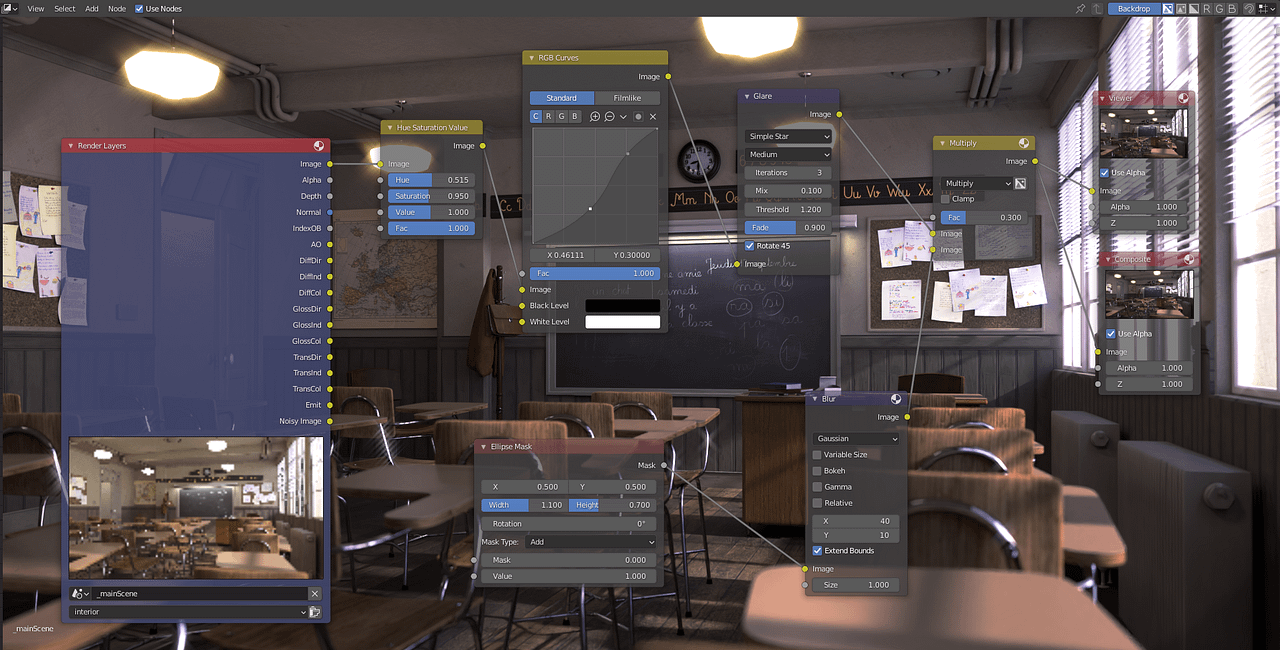
Allow'south see what all these nodes practise and return this image out:

Classroom render with Compositing
Looks very warm and cozy. Most of the frame is a chip blurred out, some haziness is added. And you tin can even come across a bit of yous can say film grain. Merely did all this make the scene better? Here is the outcome of the aforementioned render, just with Blender Composition turned off completely:
Classroom render with no Limerick
It is different, though non by that much. The first thing that I can come across is that the whole tone of the paradigm is a bit different. It is not as yellowy and warm. As well, the lamps look dissimilar, quite worse than on the previous ane. They don't feel similar they glow at all.
We won't be using any of this anyway. So I will delete all nodes and instead let's do something ourselves. Of course, it won't be as big and complicated as what there was hither, because we are making a beginner setup.
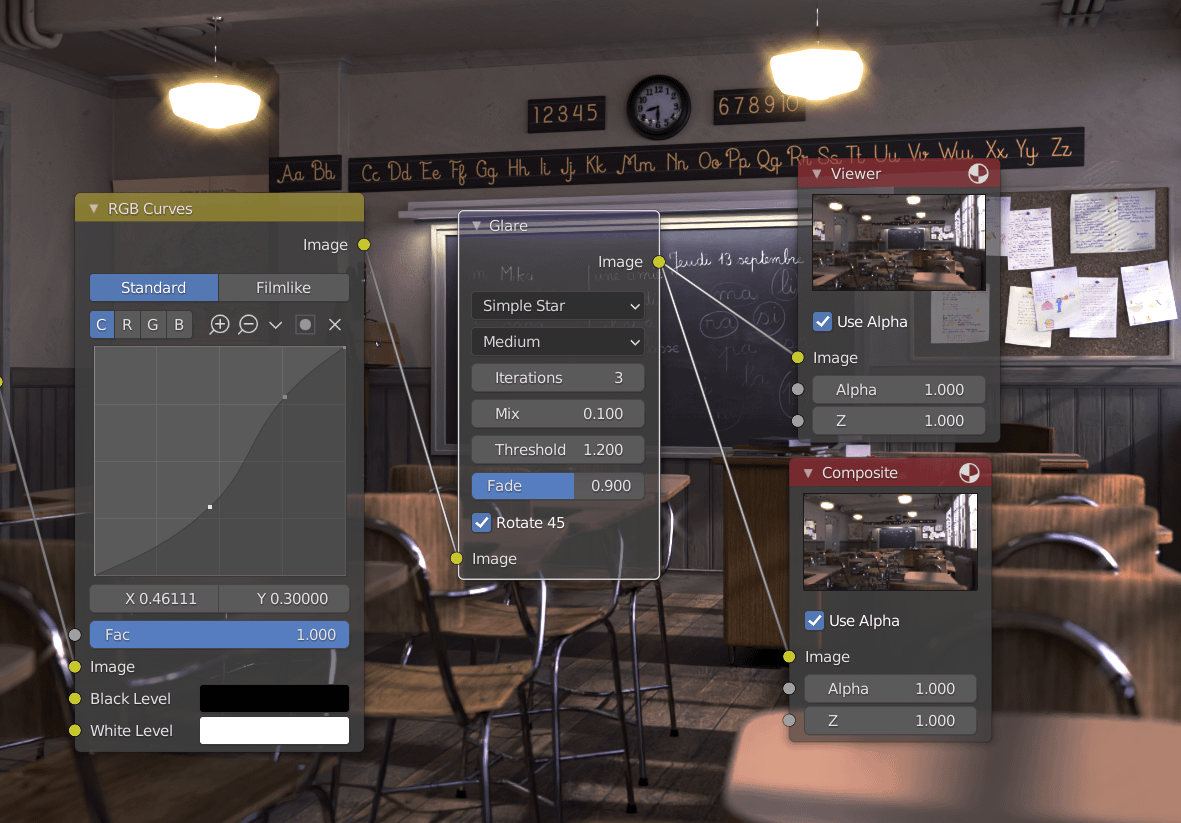
To be different from the original, allow'south try to make the scene colder instead of warmer. To achieve this I have used all the familiar nodes:
Hue Saturation Value to change for a colder hue and make the whole paradigm less saturated. RGB Curves to make everything darker and more intensive and also to add a blue tint.
Next, I have added a new node – the Glare node. It is it that made lamps glow and expect more realistic in the original render. A very powerful tool that is basically a must-accept if y'all are dealing with the lights on the image. In that location are several types of Glare and I am pretty sure that the default uses the Fog Glow, which looks keen. Just to be unlike, I will use Simple Star.
Lastly, I want to add together a vignette effect – information technology is when the corners of an image are a fleck darker than the eye. No node does it just like that, then we need to exist smarter nigh it.
By being smarter I hateful that we will use other nodes to help us in this task. First of all, information technology is an Elipse Mask node to carve up corners from the whole image.
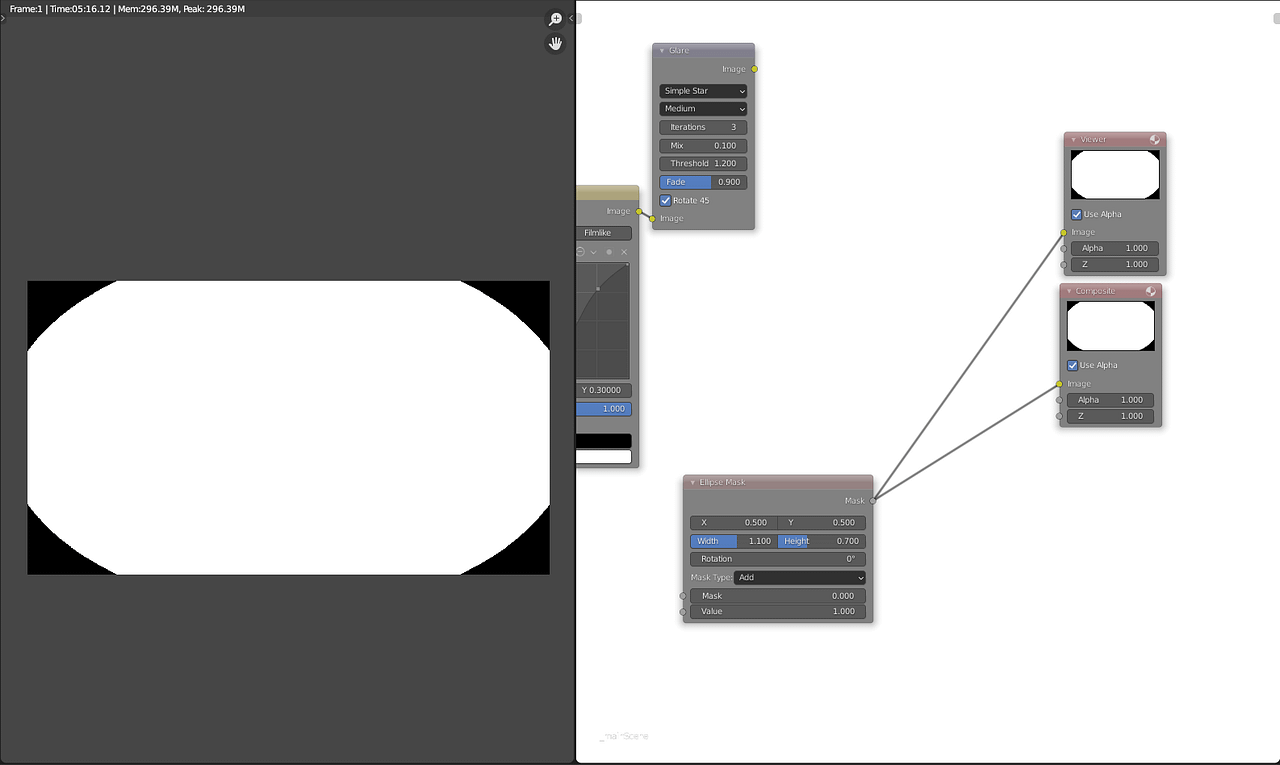
Though, every bit you can see, it has a big problem – it is basically another image. Past that, I mean that if I combine it with all the previous nodes – it volition override them all and just display this black and white image.
To avoid that I will exist using the Mix node. Equally comes from its name, it is for mixing two inputs from other nodes and combining them. Equally I want darker corners, I should use either Darken or Multiply types of this node.
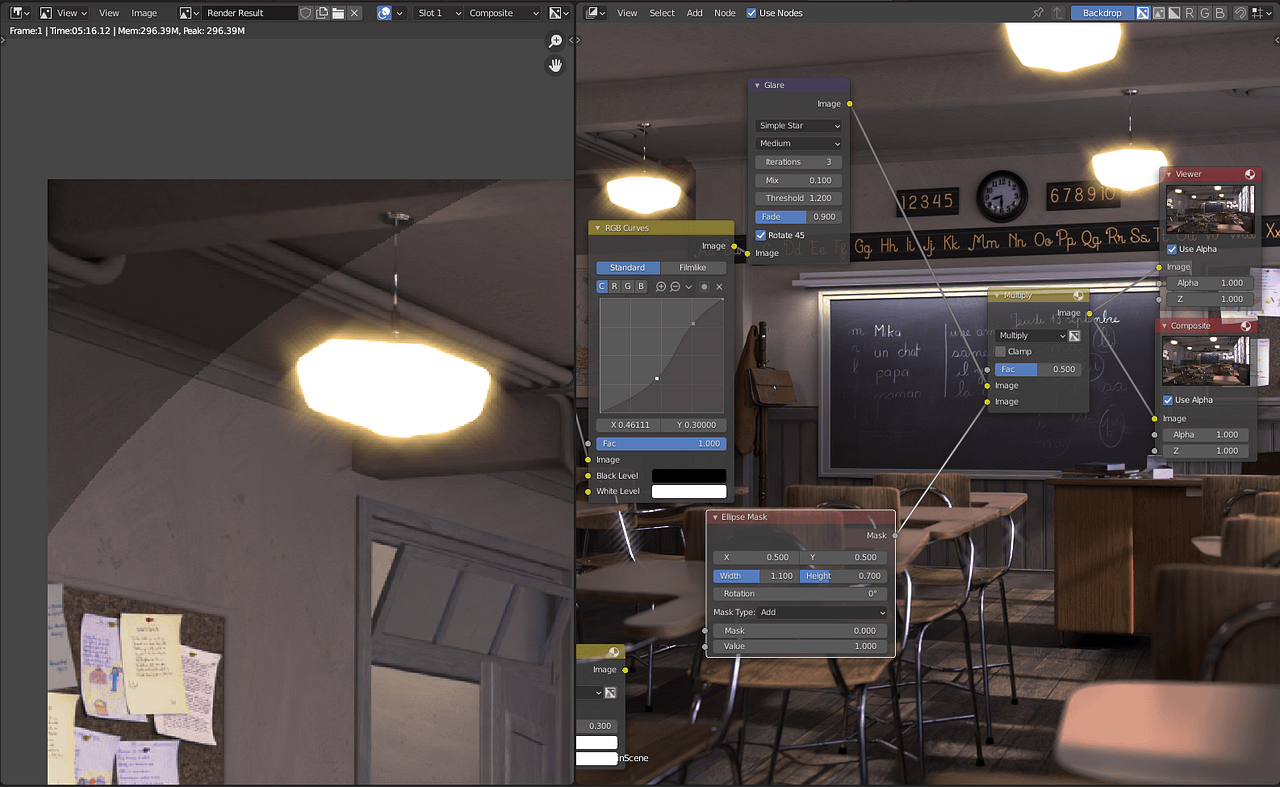
We now have a vignette event, though it is not that good. Darkened corners are as well prominent and obvious, attract as well much attention. It could be much better if we could mistiness this harsh line a bit. So I have done exactly that by adding a Blur node and connecting it to the Mask.
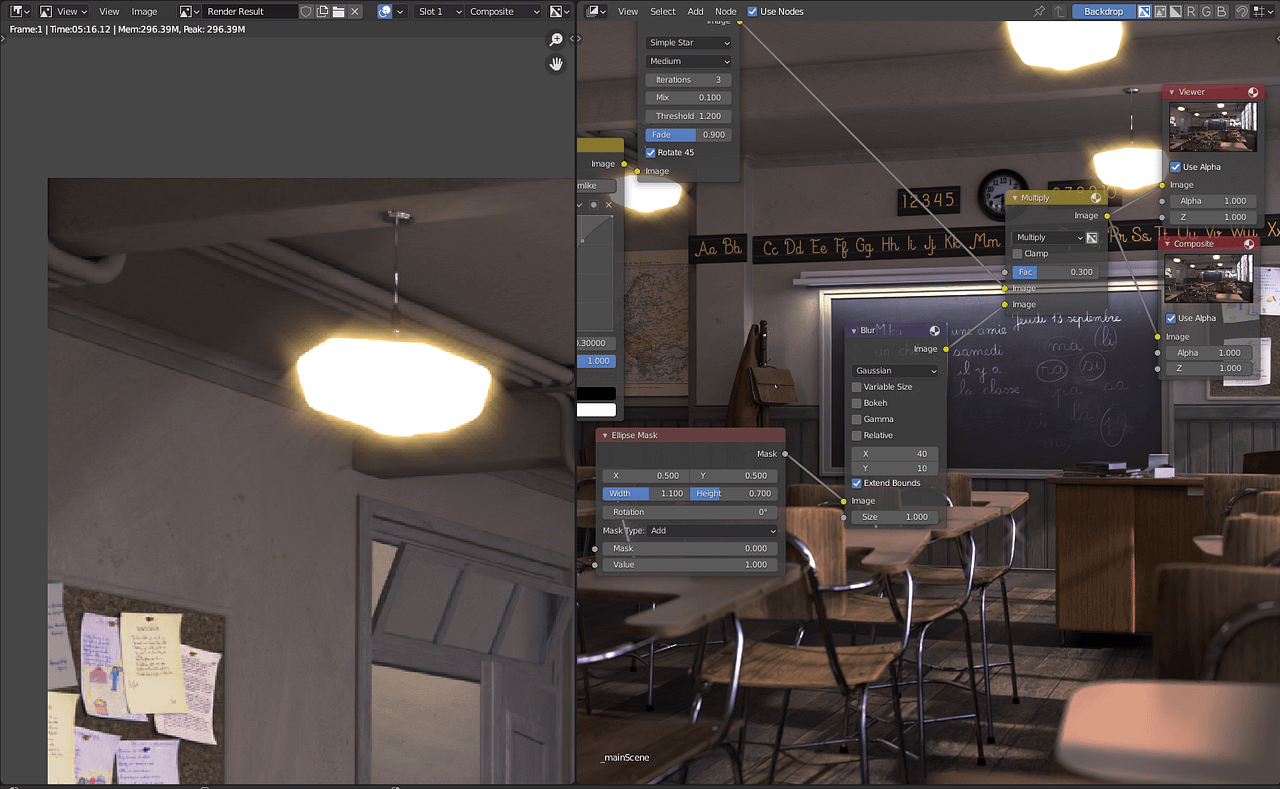
This Blender Limerick looks much better. To achieve a single consequence we take used a combination of 3 different nodes.
I think that it is enough for this example. But you definitely tin go on further and test things out. Have a look at my final node setup below:
And here is the final render of this setup:

It is an interesting result that is quite different from what nosotros had originally. And there was no need of irresolute whatever render settings or even rerendering an image. Hope that it was a proficient example for y'all.
Conclusion – Blender Composition
Nosotros established that post-processing, besides knows equally Limerick in Blender is a very important part of producing a quality return. Information technology allows you to change the expect and experience of the whole image, without changing any rendering settings and rendering images afresh. A unmarried return can provide several different results this way.
Meet also our other Blender Tutorials and 3D Model Reviews.

How To Edit A Template In Blender,
Source: https://renderguide.com/blender-composition-tutorial/
Posted by: ligginsrebt1940.blogspot.com
0 Response to "How To Edit A Template In Blender"
Post a Comment